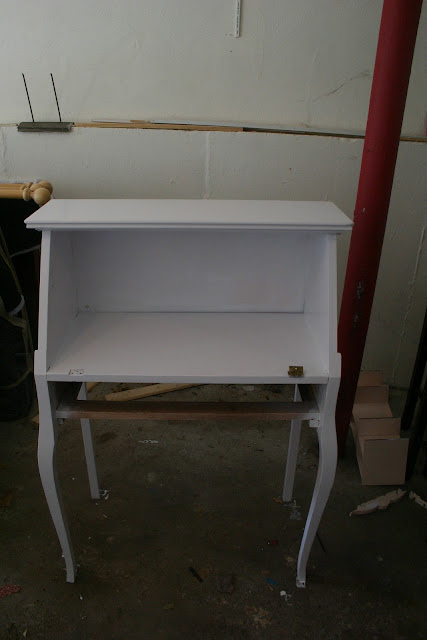
The new secretary desk is all painted and in full use. I’ll eventually need a matching chair in a similar style. Painting this desk was so easy and straightforward that I’ll enjoy finding another piece of furniture to paint! Breathing new life into a tired older piece that has been sitting around the house, basement or attic just requires a few steps. Here is what you will need…
{supplies}
sandpaper
wood filler (I used Elmer’s Carpenter’s Wood Filler)
putty knife
angled brush (I used Wooster Shortcut)
foam rollers
paint tray
primer
latex paint
new hardware
Start by taking the piece apart. I removed all the hardware, the drawer and the flip top desk. I also removed the decorative molding at the top of the desk. This was evidently a later addition to help with the pink girly look. I started out by lightly sanding the entire piece. This will help the primer as well as the paint stick and not peel. I also drilled a hole on the back left side to pass the cord for my laptop charger through, allowing my laptop to charge while the desk is closed.

Once the piece is disassembled begin filling any holes with the wood filler. Use the putty knife to scrape off any excess wood filler. I did not refill the holes I knew were being used again, such as the drawer handles. Once the wood filler has dried sand the area. Make sure to remove any excess dust.

I then began priming different pieces, the desk itself, the flip top and the drawer. I used Zissner BIN primer and found that I got the best results with a foam roller for the large areas. For corners and hard to reach spots a angled brush worked best. I used light coats so the paint would not form bubbles, painted 3 light coats of primer and then let it sit overnight. This is not very typical of how I work but being patient paid off. I usually like to see results but all the advice I found said to go slow. Great advice! One personal word of advice about cleaning up after primer. Don’t bother, messy, messy, messy! Buy a package of roller attachments. That way there is no cleanup and you can just throw it away.

The next morning I started painting again, this time using Glidden’s Arctic Stone in a semi-gloss finish. I applied 3 light coats using the foam roller and small brush for the corners again. I had been planning on then using a Minwax Polycrylic Protective Finish but decided against it. My father made a good point that if this desk got damaged at all, which is very possible in this house, I’d have to start the process all over if I put a protective finish on it. If I left it I could just touch up whatever bump or scrap occurred. I was also happy because it meant I was done a day earlier!
I then began putting the desk back together. The new drawer hardware went in…
the decorative brass hardware was nailed back on…
and the desk top and hanging hardware were assembled.
Now for the fun part, putting everything in its’ place.
I did not expect this to be this easy! I’ve got the painting bug now. Being patient is the key to success when painting a piece of furniture. Thin coats of primer and paint go a long way! Just by changing the color and updating the hardware this desk has been completely transformed. A couple simple changes such as drilling a hole for any cords and chargers can update this piece for modern day use as well.
I’m sharing this project with
Tatertots and Jello
The Shabby Nest
Shabby Creek Cottage
Live Laugh Rowe
The 36th Avenue


